Showing posts with label kids art. Show all posts

Monday, February 11, 2013

Hugs and Kisses

CTMH's "Whoo's Your Valentine" stamp set was perfect for my Valentine's Cards this year.  Three stamped images, some random stamped hearts and a few flags using Close to my Heart's new silver glitter paper, helped to create this super cute card.
 In addition to the card the kids helped me make some "hugs" and "kisses" to put into the cards we are sending to the grandparents.  They were fun to make, especially the kisses.  What little girl doesn't love putting on bright red lipstick making kiss marks?  Even I got in on the fun.
This card is perfect for this week's Heart to Heart Challenge.  Make sure you stop by and see all the great love inspired artwork.   

Saturday, June 16, 2012

Father's Day Fun

Yesterday, the kids and I finished our preparations for Father's Day and started the celebration a little bit early.  We surprised Dad with some fun BBQ cupcakes inspired by Disney's Family Fun.  They were so easy and turned out cute.  We simply used Orange sprinkles, Chocolate Frosting, Hot Tamales, Caramels, Dot candies, black decorating gel and toothpicks to decorate the cupcakes.  The kids loved making the candy kabobs and thought the Hot Tamale's looked exactly like hot dogs.  It was a fun morning project.       
 **It should be noted that these cupcakes do not last when stored in a plastic container, both the candy and the chocolate frosting started to melt and fall off, so these really only looked good for about a day.

We also made Medals to award Dad.
 The kids decorated a trophy or ribbon printable with a special award for Dad.
 They then strung some different colored Cheerios on some yarn to complete the project.
 Finished and ready to be presented to Dad in the morning.  
 Lastly we glued together 2 plastic cups, strung a pipe cleaner between the two to create a handle and decorated with foamies.  When filled with Dad's and Papa's favorite candy it will be a great trophy to give.
We all look forward to celebrating our Dads tomorrow.  Part of the fun is the preparation and the excitement of giving Dad something special made just for him.  Thankfully our Dad does not follow this blog, so he won't see the treasures he has coming to him tomorrow.

Enjoy your day and don't forget those special men in our lives that love, support and give all they have to us.

~Amy  

Saturday, March 24, 2012

Spring is in the Air

Despite the snowy weather we had this week spring still came and we had to celebrate in some way.  R. was in charge of snack at preschool this week, so we created some fun butterfly clips to hold a bag of snacks.  They were really easy and fun to make.  

1.  R. painted and decorated clothespins for the butterfly bodies.  
2. Next she adhered two googly eyes.  They look kind of goofy, but cute.
 3. I filled a snack size bag with goldfish on one side and grapes on the other, leaving some space in the middle to clip the clothespin.  After attaching the clothespin, I bent and twisted half of a pipe cleaner an inserted in the top of the clothespin for the antennae. 
We were happy with how cute they turned out and R. was proud to bring them to school.  Thanks familyfun.com for the idea!  Now if the outside would just match the calendar.  I did notice a few crocuses peeping through the ground today.  Spring should be here soon!
~Amy

Friday, February 10, 2012

Made with Heart

Valentine's Day is right around the corner and we have been busy making cards for our family and teachers.   This weeks challenge at Heart 2 Heart was to make something for someone you love.  Eventhough it is a day for sweethearts, we also like to send cards to our family to let them know how much we love them. 

If you follow my blog, you know that I like to use my children's art to create things.  These kid crafted cards are by no means meant to be pristine and gorgeous, but they are beautiful because they were made with little hands that were fully committed to the fun of creating.  I think they will be loved by the Grandparents, Aunts, Uncles and Cousins who will receive these little gems.  

Using CTMH white card stock, the kids stamped hearts onto the cards using cut up toliet paper rolls in pink and red. 


 I stamped the simple phrase of "Be Mine" using CTMH Typeset Letters and mounted them on holiday red cardstock.  My daughter assembled and glued them on the cards. 

Some of the cards were very uniform.
 Some were a little random.
 A some were down right crazy!
None the less they were made with love and turned out looking pretty festive. 

Make sure to check out some more artwork "For the One/s You Love" at Heart 2 Heart.

~Amy

Thursday, December 22, 2011

Tradition 7- "A Humble Stable"

New traditions can be fun.  Yesterday we had some friends over and the kids created these cute little stables with Mary, Joseph, shepherds, sheep, a donkey, angles and of course Baby Jesus.  This was the perfect activity for kids of all ages, ours ranged from 2 1/2 years-9 years and all were happily engaged during the entire time.  J. the youngest enjoyed eating the candy, watching the "big kids" and talking, while W. the oldest carefully constructed and decorate each piece of his nativity.  

Here are the final projects. They turned out pretty cute.  (Click on the picture if you would like to see a larger version.) Now each of my children have their own nativity displayed in their rooms.   
 Making a little sheep using a jumbo marshmallow and black licorice. 
 Hay made from coconut with a sweet angel on top. 
The idea came from here with instructions and a recipe for frosting.  I just used store bought frosting and took inspiration from the picture. 

It was a great morning with friends to celebrate and remember the greatest gift that was born on Christmas morning in, as E. would say, "a humble stable."  

Merry Christmas!

~Amy 

Friday, November 18, 2011

"Hand Made" Fun

With our first real snow this morning, it IS beginning to feel like Christmas.  As Thanksgiving approaches, the hustle and bustle of the holiday season always sneaks up on me and goes by way too fast.  I try my best every year to get as much done as I can before Thanksgiving, but even so, it still seems like there is not enough time in the day to do all I want to. 

During the month of November, I always make a point to make and finish our "Hand Made" Ornaments for our homemade Christmas tree.  Ever since our daughter was a baby I have created hand/foot print ornaments.  It is fun to see how big both kids hands and feet have gotten.  This is the first year their hands have been too big to combine in a joint ornament.  I think next year I may have to use thumb prints to keep the ornaments at a manageable size.  Here is a Studio J layout I created talking about our tradition. 
Drum roll.....here is this year's ornament.....SANTA!  I saw an adorable porcelain hand print ornament similar to this and just adapted it to paper and to my kids' hands.  Aren't they adorable?  I am tickled with how they turned out.
 The hats noses and mustaches are just paper pieced on. The kids helped me put on the eyes and added the fluffy paint to Santa's Hat.  To make fluffy paint, simply combine equal parts shaving cream and Elmer's glue.  I let the kids use their fingers to decorate.  When the paint dries it has a spongy consistency and looks and feels pretty cool.  Would be great for a snow scene painting too. 

Here's to the first of many holiday posts!  Happy Crafting!

~Amy

Monday, June 20, 2011

Better Late.....

With a broken camera last week and only the use of a disposable camera (with two little ones, it's hard to go even a day without a camera) I am a little late sharing my Father's Day projects.  But wanted to share just the same.  Better late then never....right? 

Anyway, we had a fun time decorating these cute plastic pencil/pen holders for our Papa and Grandpa.  Notice the background paper is random stamped with the kids finger prints, then transformed into bugs by adding antennae and legs.  Loved using the bright colors of CTMH Exclusive Summer Inks to make these colorful bugs.
Tip of the Day:  Children's finger/hand/foot prints make perfect stamps for background and texture papers or even embellishments for scrapbook layouts.  Check out this cute turkey  I added to a calendar layout.  The kids grow so fast, hands included, and it just makes me happy to look back and remember their sweet little hands.  I think their Grandpa's will like to look at these little finger prints as the years go by too.  Stay tuned for more "hand" made art throughout the year. 

Here is another smaller pencil/pen holder I made for my husband.  No creative art from the kids, the rolled up paper in the container are colored and decorated notes from them, just pictures of them for Joel to display at work.      
The plastic pencil/pen holders were purchased at Michael's for $12.99 or less when using their coupons.  These were easy and fun projects to make.  All Dads were happy to receive them yesterday. 

~Amy 

Tuesday, April 26, 2011

Crafting with Kids

Since I started blogging my crafting accomplishments in February, I have been doing a lot more crafting, and finishing many more projects. It feels great to be using my supplies. I feel more like a crafter now, versus a collector...or heaven forbid....A HOARDER!!!! Well, with more crafting means I spend more time in my craft room, which also means the kids want to be in there with me too. It can at times be a little crazy, to say the least. The kids love to look at all my stamps, inks, ribbon etc. Sometimes it looks as if a tornado hit the room after we are ALL finished with it. Most of the time our craft room adventures end with me yelling at the kids and banning them from the room.

Finally I wised up.....
Tip of the Day: Don't fight your kids need to be with you, embrace it. When you are crafting, encourage your children to craft with you. I set a TV tray/"craft desk" for my daughter right next to mine, so she could work on projects too while I am working on mine. We set specific rules for using my materials (ie. one stamp set and ink at a time, clean stamps after each use and put back materials before getting out new [that's one rule I need to learn to follow]. It has been great, and we really enjoy our crafting time. I have also found that because I have allowed her to craft with me using some of my "special" materials, there isn't as big of a desire to get in and use what is forbidden. Granted there a still some crazy times, but far less than before. Note the craziness occurring right in the background of the below picture as her little bro tries to get into supplies on my other table. Looks like we need to bring in his blocks or Lego's. Here is an example of a little project she worked on to give to her cousins for Easter. We started with a carton of Whoppers.
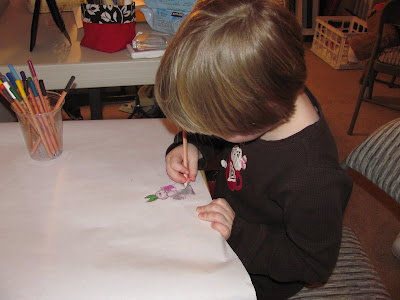
I stamped the cute rabbit figures from the CTMH Sensational stamp set to create an Easter scene, mounted it on some card stock and scored fold lines to place around the carton. My daughter loved coloring the intricate stamp images. It was better than a coloring book.
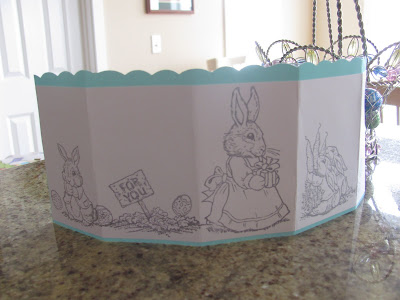
We glued them around the carton added a handle and some crinkled up paper. They made perfect little gifts for her cousins. She was proud to give them.


~Amy