Showing posts with label cooking. Show all posts

Saturday, June 16, 2012

Father's Day Fun

Yesterday, the kids and I finished our preparations for Father's Day and started the celebration a little bit early.  We surprised Dad with some fun BBQ cupcakes inspired by Disney's Family Fun.  They were so easy and turned out cute.  We simply used Orange sprinkles, Chocolate Frosting, Hot Tamales, Caramels, Dot candies, black decorating gel and toothpicks to decorate the cupcakes.  The kids loved making the candy kabobs and thought the Hot Tamale's looked exactly like hot dogs.  It was a fun morning project.       
 **It should be noted that these cupcakes do not last when stored in a plastic container, both the candy and the chocolate frosting started to melt and fall off, so these really only looked good for about a day.

We also made Medals to award Dad.
 The kids decorated a trophy or ribbon printable with a special award for Dad.
 They then strung some different colored Cheerios on some yarn to complete the project.
 Finished and ready to be presented to Dad in the morning.  
 Lastly we glued together 2 plastic cups, strung a pipe cleaner between the two to create a handle and decorated with foamies.  When filled with Dad's and Papa's favorite candy it will be a great trophy to give.
We all look forward to celebrating our Dads tomorrow.  Part of the fun is the preparation and the excitement of giving Dad something special made just for him.  Thankfully our Dad does not follow this blog, so he won't see the treasures he has coming to him tomorrow.

Enjoy your day and don't forget those special men in our lives that love, support and give all they have to us.

~Amy  

Sunday, April 8, 2012

Happy Easter!

Just a quick post today with a fun spring/Easter treat.  By simply coloring coconut green and sprinkling on the top of a frosted cupcake, then adding candy eggs (cadbury, chocolate candy coated or jelly beans) you can create a cute spring nest. 
This has been a favorite treat of mine since I was a child and my Mom use to make these for me to bring to school for my birthday. 
 They looked festive this morning grouped together on a cake stand.  The children at our Easter brunch loved them. 
Enjoy!
~Amy

Friday, March 2, 2012

Party Hats All Around!

Today is a kind of a big day...it is Dr. Suess Birthday and boy are we ready to celebrate.  After 6 years of working in the schools, I missed celebrating this fun day and decided to carry on the tradition with my kids.  It is super fun and now that we had done it so often, both kids anticipate this day with much excitement.   
Even before they were old enough to truly understand, we had a party!  Here we are in 2008.  Look at that super tall "Cat in the Hat" strawberry cake.  It almost fell over when we cut it.  I think it was two white cakes stacked on each other with strawberry whipped cream in between the layers.     
 The party always include reading our favorite Dr. Suess books and playing a few games. Here we are in 2009.  
Now 2010. It is always a fun time with family (I love this picture of my Mom with the kids, it truly represents who she was...a great mother and a grandmother who loved to be surrounded by her "kids").  Good thing we have cousins nearby to celebrate with us.  Hey do you notice a reoccurring staple of our Dr. Suess party?  Of course the "Cat in the Hat" hats!     
 And what would a Dr. Suess party be without green eggs and ham?
 This year our party is a little more low key, but are ready for big day of fun none the less.  Since IHOP has a special "Lorax" breakfast and "Trufula tree" pancakes, we will be headed there for a fun lunch.  Afterwards, we plan to catch "The Lorax" movie.  Check out the fun snack I made to sneak into the movie theater.  Green Eggs and Ham!  These are so easy to make.  Simply take two pretzel sticks and melt a white chocolate wafer on top.  I put them in a warm oven, 235 degrees for about two minutes, then press a green m&m on top.  Let them cool and package up for a fitting Dr. Suess snack.   

And what about those party hats?  Of course we are going to be bringing them and proudly wearing them at our Dr. Suess outing.  We are who we are and thanks to Dr. Suess we don't to need to "mind" those who don't "matter". 

Happy Birthday Dr. Suess! 
Thanks for all the enjoyment you bring to my family and me. 
Your rhymes are by far the best I can see. 
And your words encourage me to be who I be.

We love you...even though we (or at least Mom) need more practice with our rhymes.  

~Amy 

Wednesday, February 22, 2012

A Pretty Meal

Today I created a fun freezer meal of Chicken Taco Soup to give to a family at my daughter's preschool whose mother fell and broke her leg.  Freezer meals are perfect to bring to a family in need.  They are easy to prepare and are stored in Ziploc bags, so are disposable.
 To dress up the dull Ziploc bag and make the meal a little more special, I took inspiration from this weeks Heart 2 Heart Challenge Sketch.
 Since the bag topper was rectangle, I had to make a few adjustments.  Can you see the inspiration?
 I even added a smaller topper for the chocolate chip cookies too.  I love how pretty the Stella Compliment Canvas shapes are.  They add such a special touch to these simple projects. 
 I put the entire meal in a cheap Albertson's reusable bag to contain the meal in a nice compact package to deliver. 
~Amy

Saturday, December 24, 2011

Tradition #8-Cookies, Cookies and More Cookies

fWhat is Christmas without Christmas Cookies?   l love to bake and preparing cookies to eat over the holidays, more importantly Christmas Morning is a tradition that I love and have grown to love even more as the kids have gotten older.  We make several kinds of cookies, but the kids love the Spritz, Sugar and Gingerbread Men cookies the best.  Most likely because they get to help decorate them.   
 OOPS!   We have had several mishaps with the sprinkles this year.   Just more sugar, right?

 We know what this guy likes, the dough!  Looks like he's has a little too much. 

 Perfect! 
Think Santa will pleased with his cookies this year. 

Merry Christmas!

~Amy

Monday, December 19, 2011

Tradition #5-A Sweet House

Another favorite tradition of ours is to put together and decorate a gingerbread house.  I remember my Mom making a gingerbread house every year for Christmas.  She would wake up bright and early and bake and cut the gingerbread before we all woke up.  Waking up to house filled with the smell of gingerbread baking will be something I will never forget. 

I have made a few gingerbread houses by scratch many, many years ago before having children, and let me tell you it is not a simple project.  The gingerbread has to be baked just right to be able to cut and construct the house perfectly.  I don't know how my Mom did it every year!  Eventhough I miss the smell of freshly baked gingerbread, I will happily purchase and construct the premade houses for my children.  It is just so much easier.   


Each box you purchase comes with bag of sugar mixture you can use to decorate, but I find that my Mom's royal icing recipe works better.  It hardens and holds the house together more quickly. 

Royal Icing:
3 Egg Whites
1lb. Powdered Sugar
1/2 t. cream of tartar

*Beat icing for 7-10 minutes
Cover with towel when not using so it doesn't dry out.

~Amy

Sunday, October 30, 2011

Dem Bones

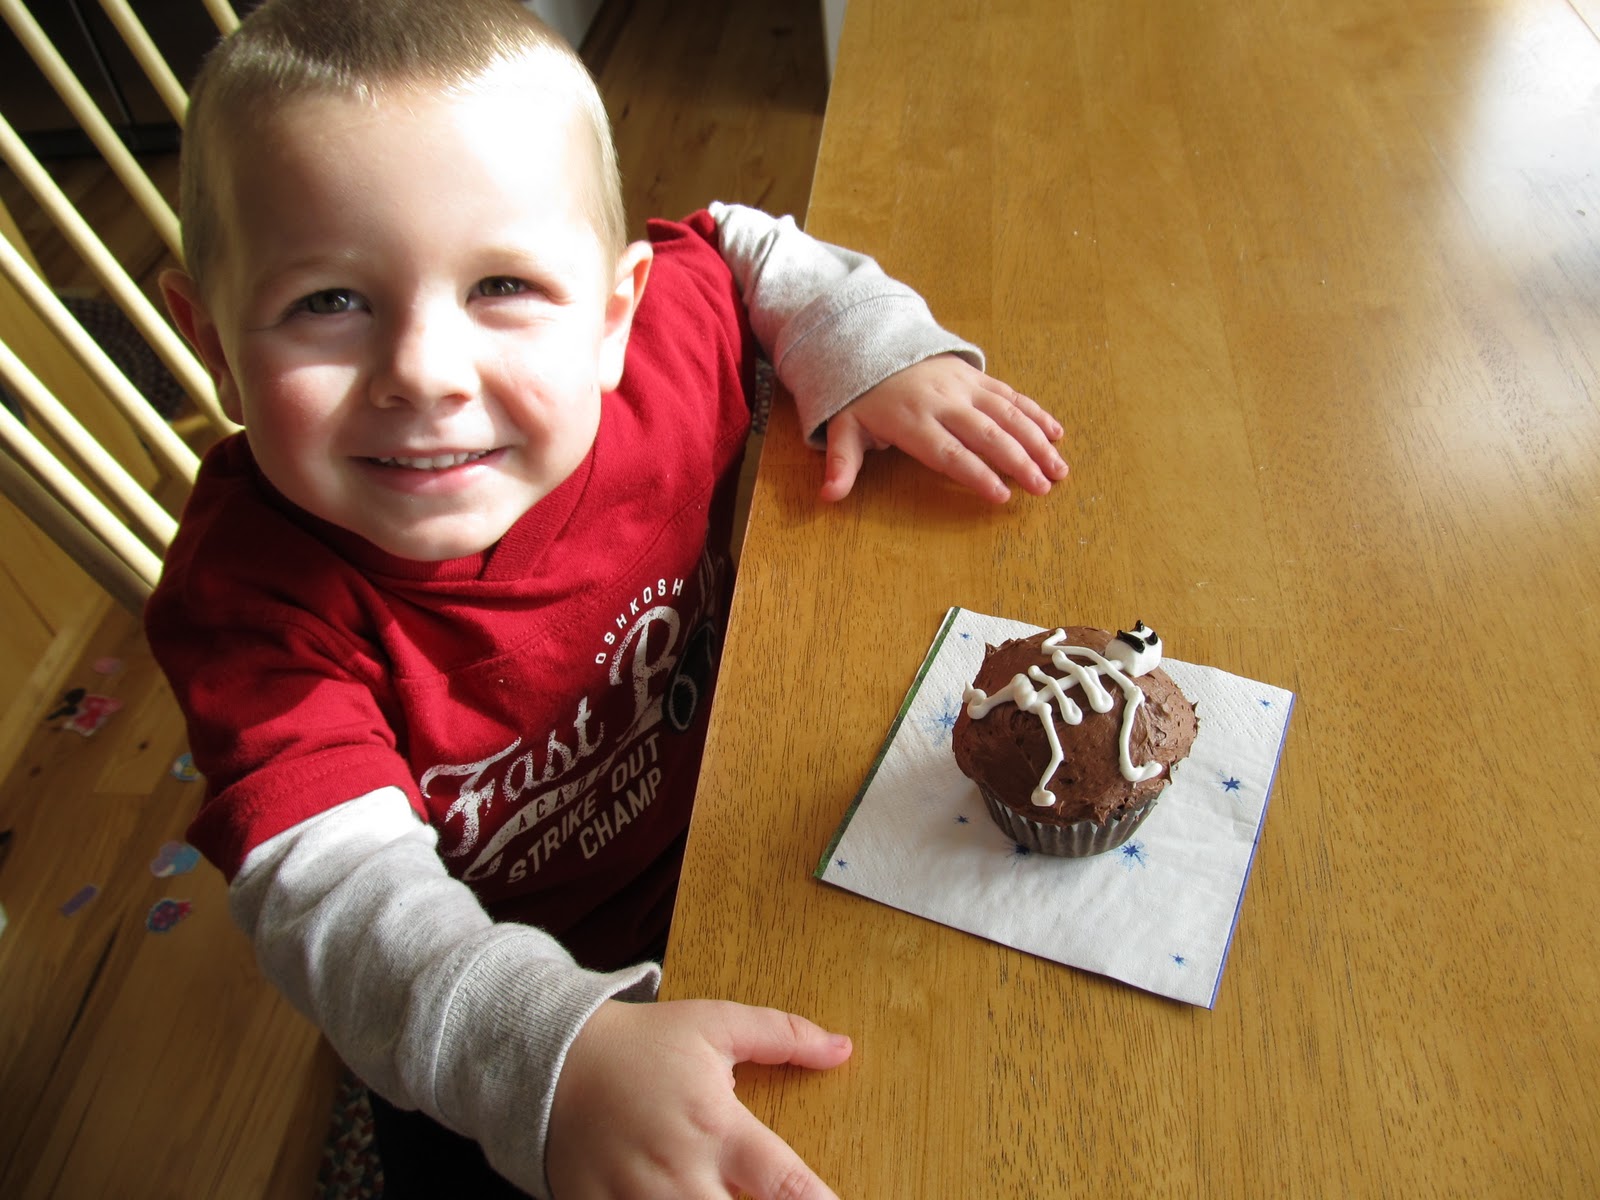
Just one last Halloween post to get your creativity flowing for the big day tomorrow.  Costumes to come in a few days. 

Want to spruce up plain old chocolate cupcakes.  Add a marshmellow and pipe on some white frosting to make these cute little skeletons.  I am not a cake decorator...as is obvious, but these turned out pretty cute and were really easy to make.  Yet again another fun idea from Family Fun. 
 Your little goblins will love them too!
Happy Hauntings!

~Amy

Wednesday, October 19, 2011

Creative Snacks

This week I was in charge of bringing snacks for my daughter's school.  Being a former Speech Therapist, I was excited to use the "letter and theme of the week" to create some fun and educational snacks.  So, the week before our assigned snack week, I eagerly asked the teacher what the new letter and theme of the week would be.  She told me "L."   "L" as in lion, lizard, leopard, lolly pop........nothing too exciting or healthy!  Why didn't I chose the week before, "P?"  I could have made oh so many fun "pumpkin" treats. 

After thinking about it for a while, I decided to focus on the theme, "Leaves."  I browsed the internet for ideas and was able to come up with a good plan.  Here is one of our favorite snacks we made....... 

Pile of leaves!!!!!!
This cute and ever so simple snack is basically a rice krispy treat made from cornflakes.  After combining 3T melted butter, 4 cups of marshmallows (heated/melted) and 6 cups of corn flakes I just placed "piles" of the mixtured on a slighly greased cookie sheet.  I found it was easier to scoop out the treats after the mixture had had a few minutes to cool.  Don't wait too long or it will become to difficult to seperate into piles. My daughter help to add a few pumpkins to the the "Leave Piles" to get them some color.

This snack was a big hit with both the teachers and the children.  Plus it was easy and quick to make.

TIP OF THE DAY:  Don't be too proud to search the internet for ideas.  There are so many helpful and fun websites to gather information from, why not utilize it.  I would love to say the I am the sole creator of everything I do and make, but really in some way or another, I create from what I have seen or done before.  Therefore I am a constant searcher and idea grabber from anywhere I can get it.

Happy "leaf raking"....and "treat making!"  ;o)

~Amy    

Saturday, October 15, 2011

Festive Fall Recipe

I just got on Pinterest yesterday and think it is pretty cool.  I am still trying to get the hang of it, but think it will be a great resouce for all things, crafty, yummy and pretty.  Found these cute  Martha Stewart cookies on Pinterest and pinned them to my Halloween Board.  Couldn't wait to try them out, so since it was cold and foggy morning, I decided to whip out a few quick batches.    
Candy Corn Sugar Cookies
Right after removing the cookies from the oven, be sure to press in the candies.
  • Prep Time 15 minutes
  • Total Time 30 minutes
  • Yield Makes about 36
Ingredients
  • 4 tablespoons unsalted butter, very soft
  • 1/2 cup sugar
  • 1 large egg yolk
  • 1/4 teaspoon vanilla extract
  • 1/4 teaspoon baking powder
  • 1/4 teaspoon salt
  • 3/4 cup all-purpose flour, (spooned and leveled)
  • About 36 candy corns

Directions

  1. Preheat oven to 350 degrees. Place butter and sugar in a medium bowl; beat with a wooden spoon until combined. Beat in egg yolk, vanilla, baking powder, and salt. Add flour, and mix until a dough forms.
  2. Scoop out level teaspoons of dough, and roll into balls (chill dough briefly if it becomes too soft to handle). Place balls on baking sheets, 2 inches apart.
  3. Bake, rotating sheets halfway through, until edges are firm and cookies are dry to the touch (do not let cookies color), 10 to 12 minutes.
  4. Remove from oven; gently press a candy corn into center of each cookie (surface of cookies may crack slightly). Cool on sheets 1 minute; transfer to a rack to cool completely.

Cook's Note

Chocolate Variation: Reduce the amount of flour given in the recipe to 1/2 cup. Add 1/4 cup unsweetened cocoa powder along with the flour in step 1, and proceed.

These cookies were so easy and quick to make--tasty too.  There was no frosting, decorating or piping involved.  Great for the kids to help press the candy corn into the cookies, although be careful with little little children, so they don't burn themselved on the hot cookie tray.  I plan to make these right before Halloween to bring as gifts to family and friends.  So cute and festive.  Love these!

~Amy

P.S. Although the recipe says makes 36 cookies I only got between 16 to 20 cookies per batch, but with both chocolate and plain cookies there are plenty.  I may double recipe in the future.    

Monday, October 10, 2011

Apple Sweetness

This weekend we headed to Greenbluff to visit Seimer's, our favorite farm.  We made it through the corn maze, rode the "choo choo" trains and picked some perfect Jack-O-Lantern pumpkins.  It was a beautiful October morning. 
 While there, we also picked up a big bag of sweet Honey Crisp Apples.  I decided I would attempt to bake an apple pie.  Don't you just love the smell of apples and cinnamon baking in the oven, especially on a chilly autumn day?  I am by no means a "pie maker," and aside from the annual pumpkin pie and a few huckleberry pies here and there, this was my first attempt at an apple pie.  It is not the most perfect looking pie, but pretty good, if I do say so. 
I found this great recipe  from Grandma Ople.

Ingredients
  • 1 recipe pastry for a 9 inch double crust pie
  • 1/2 cup unsalted butter
  • 3 tablespoons all-purpose flour
  • 1/2 cup white sugar
  • 1/2 cup packed brown sugar
  • 1/4 cup water
  • 8 Granny Smith apples - peeled, cored and sliced

Directions

  1. Melt butter in a sauce pan. Stir in flour to form a paste. Add white sugar, brown sugar and water; bring to a boil. Reduce temperature, and simmer 5 minutes.
  2. Meanwhile, place the bottom crust in your pan. Fill with apples, mounded slightly. Cover with a lattice work crust. Gently pour the sugar and butter liquid over the crust. Pour slowly so that it does not run off.
  3. Bake 15 minutes at 425 degrees F (220 degrees C). Reduce the temperature to 350 degrees F (175 degrees C), and continue baking for 35 to 45 minutes.
Aside from tossing some cinnamon onto the apples and pouring the caramel mixture on the apples prior to adding the lattice crust, I followed the recipe above.  It was easier than I thought and tasted delicious.  Think I will have to start attempting to make pies more often.  

Hope you enjoy this recipe as much as we did!  Happy Baking!

~Amy 

Wednesday, May 4, 2011

Unicorns???? or Pigs with Party Hats????

I think they look like pigs with party hats, but they were really suppose to be unicorns for my daughter's birthday party this past weekend.
Even though they didn't turn out how I had envisioned them, they were cute none the less and my daughter was thrilled with her "Unicorn Party." She has been wanting and planning this party for at least 2 months, thanks to the Birthday Party Express catalogs we get ages before the actual birth day.

After everyone arrived, each child receive a headband with pony ears and a pony tale. They were unicorns in training and had to earn their "horns," those fun unicorn horn shaped lolly pops, by participating in lots of fun games. They had to learn to gallop like a unicorn.....

Find treasures in a cloud....pin the horn on the unicorn..... and find even more treasures by cracking open a unicorn pinata. It was a magical day!

Dinner was easy with a 3 foot long sub sandwich from the grocery store, star, heart and moon shaped PB and J sandwiches for the kids as well as other treats from the "Unicorn Cloud."


Here's our cute rainbow fruit tray.

The sandwiches, rainbow and cloud fluff (jello and cool whip parfait) and of course unicorn's favorite food, VEGGIES and dip!!!!

Star and unicorn horn pasta salad.

Last of all baby unicorn horns...aka Bugles.

Even though, I secretly wished and tried to persuade my daughter to have a "Tangled/Rapunzel" party, I am glad we went with the theme she truly wanted. It was a great day for everyone.

~Amy

Wednesday, March 16, 2011

Happy St. Patty's Day!

I have been on a rainbow kick lately, so decided to make some "rainbow" cupcakes for St. Patrick's Day. I had seen this recipe several years ago in a Family Fun magazine and was just reminded of it again this year. What a great recipe for tomorrow!

It is so easy, just prepare white cake batter and then separate into six individual bowls. Dye each bowl of batter a color of the rainbow. Than pour a spoonful of each color into sprayed or lined cupcake tins. Frost as desired. I used yellow/gold frosting and the the kids decorated them with green sprinkles.

I was a little worried it after baking, the rainbow would be more of a pastel rainbow, but the colors stayed so vibrant and bright. It almost looks like a tie dye shirt.
Here are the number of drops of food coloring I used for each color;
Purple- 9 red and 6 blue drops
Blue- 12 drops
Green- 12 drops
Yellow- 12 drops
Orange- 12 yellow and 4 red drops
Red- 18 drops
I think the kids would agree that is was pretty tasty too!
YUM!

~Amy

Monday, March 7, 2011

Whooooo Loves You?

With spring just around the corner, there are lots of new babies on the way. I made several of these 3x3 cards to have on hand whenever I need them. I used the CTMH "Love you Forever" Stamp Set and the "Sweet Pea" paperpack. I usually prefer solid stamps to line stamps, but by cutting and layering different cardstock and B&T papers, it really made these little owls pop.
It just happens that this card can also be used for this week's Heart to Heart Challenge http://heart2heartchallenges.blogspot.com/. The challenge was to use at least three stamped images to create a scene. These little owls, the saying and the button flower made the perfect baby card.
A mom in my MOPS group just had a baby, so am able to use one of these card immediately. Tomorrow everyone in our group is to bring some type of frozen meal/treat to deliver a care package to her. Hopefully it will make the first few weeks a little bit easier. I made a chicken tetrazinni casserole (see recipe below) that can easily be frozen and heated at anytime. I also got a little something for the baby and his siblings to make my gift complete.
I think the bow and cute card make this boring casserole seem a little more special.
Tip of the Day: When bringing dinner to a friend and/or neighbor, make sure to put your meal in a disposable dish, so the person receiving the gift does not need to worry about returning your dish.
Chicken Tetrazinni
(A family recipe that I grew up with. Don't know where my mom got it, but it is so easy to prepare and tastes great...I don't think it is low fat though.)
4 chicken breast boiled and cubed into pieces
1 can cream of mushroom soup
1 large can of evaporated milk
1 cup chicken broth
2 T. cooking sherry
Dash of pepper
Dash of nutmeg
Dash of garlic powder
1 small can of mushrooms
1/2 pound of grated cheedar cheese
Parmesean Cheese
1 pount of spaghetti noodles
Stew chicken, save 1 cup of chicken broth, remove chicken and then cook spaghetti in remaining liquid. Make sauce by combining all the ingredients except, chicken, noodles and parmesean cheese.
Layer spaghetti, chicken cubes and sauce. Sprinkle with parmesean cheese.
Cover and cook in a 350 degree oven for 30 minutes. Remove cover and cook for another 30 minutes.
Casserole can be frozen before cooking. Defrost throughly before cooking.
Enjoy!
~Amy