It's time to start our monthly Scrappy Creation Classes for 2015-2016.
As always, classes will be held the 2nd Thursday of each month September-June (December is usually an off month).
Our first class will be Thursday, September 10th at 7PM.
Please RSVP with your Kit choice, no later than Monday, August 31st.
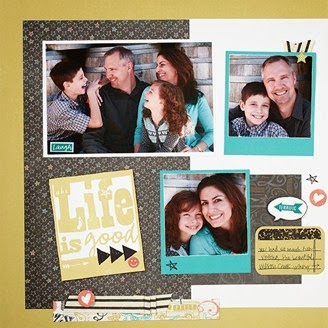
In September, we will be creating 2 cute layouts (total of 4 pages) using CTMH Zoe paper packet. By combining stamping and fun accessories these layouts will definitely stand out in your albums. The pages are great for summer vacation photos or even back-to-school photos.
Zoe Paper Pack
Zoe Assortment
All kits for the Thursday class are pre-cut and ready to go, unless you let me know that you don't want me to cut your paper.
Please chose from the following kits and RSVP no later than Monday, Aug.31st with your kit choice.
Kit 1: $21 (includes paper pack, assortment, extra white daisy cardstock and enough coral trim to complete layouts)
Kit 2: $14 (includes paper pack and extra white daisy cardstock
Kit 3: $27 (includes paper pack, assortment, extra white daisy cardstock and complete roll of coral shimmer trim).
Aren't able to attend the workshop but want to make pages, request kit and I will get it to you pre-stamped and ready to go. Please add $2 additional fee for stamping.
or
Siimply purchase the Worshop on the Go at my CTMH website and it will be delivered directly to your door.
The following ink pads will also help you complete your layouts:
See you soon!
~Amy


.jpg)